THM: Burp Sutie-Extensions

Ref:
Task 1 Introduction
Welcome to the Burp Suite Extensions room! In this room, we will explore the modular aspects of Burp Suite, focusing on its exposed functionality that allows developers to create additional modules for the framework.
While coding Burp modules is beyond the scope of this module, we will briefly examine the API documentation and discuss the typical process of adding new modules using the Burp Suite BApp Store.
To complete this room, you will not need a target machine, but make sure you have access to a copy of Burp Suite. If you are using the AttackBox, ensure that it is started now by pressing the blue Start AttackBox button at the top-right of the room. Let’s dive into the exciting world of Burp Suite extensions and extensibility!
Task 2 The Extensions Interface
The Extensions interface in Burp Suite provides an overview of the extensions loaded into the tool. Let’s take a look at the different components of this interface:
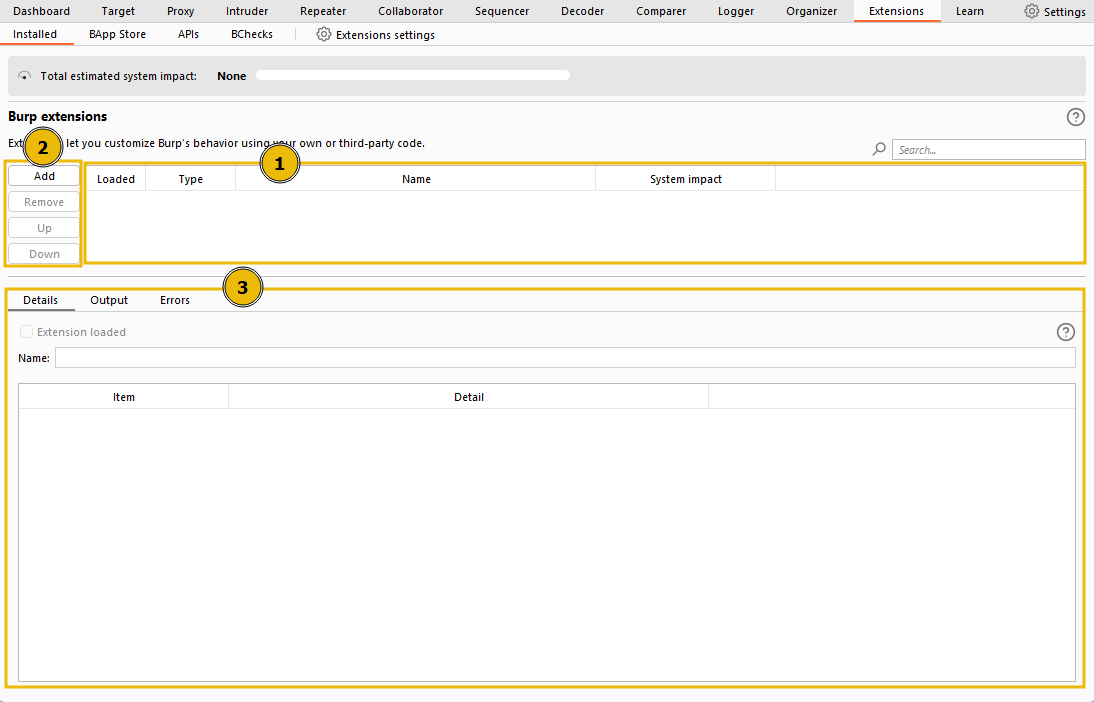
Extensions List: The top box displays a list of the extensions that are currently installed in Burp Suite for the current project. It allows you to activate or deactivate individual extensions.Managing Extensions: On the left side of the Extensions interface, there are options to manage extensions:Add: You can use this button to install new extensions from files on your disk. These files can be custom-coded modules or modules obtained from external sources that are not available in the official BApp store.Remove: This button allows you to uninstall selected extensions from Burp Suite.Up/Down: These buttons control the order in which installed extensions are listed. The order determines the sequence in which extensions are invoked when processing traffic. Extensions are applied in descending order, starting from the top of the list and moving down. The order is essential, especially when dealing with extensions that modify requests, as some may conflict or interfere with others.
Details, Output, and Errors: Towards the bottom of the window, there are sections for the currently selected extension:Details: This section provides information about the selected extension, such as its name, version, and description.Output: Extensions can produce output during their execution, and this section displays any relevant output or results.Errors: If an extension encounters any errors during execution, they will be shown in this section. This can be useful for debugging and troubleshooting extension issues.
In summary, the Extensions interface in Burp Suite allows users to manage and monitor the installed extensions, activate or deactivate them for specific projects, and view important details, output, and errors related to each extension. By using extensions, Burp Suite becomes a powerful and customizable platform for various security testing and web application assessment tasks.
Are extensions invoked in ascending (A) or descending (D) order?
1
D
Task 3 The BApp Store
In Burp Suite, the BApp Store (Burp App Store) allows us to easily discover and integrate official extensions seamlessly into the tool. Extensions can be written in various languages, with Java and Python being the most common choices. Java extensions integrate automatically with the Burp Suite framework, while Python extensions require the Jython interpreter.
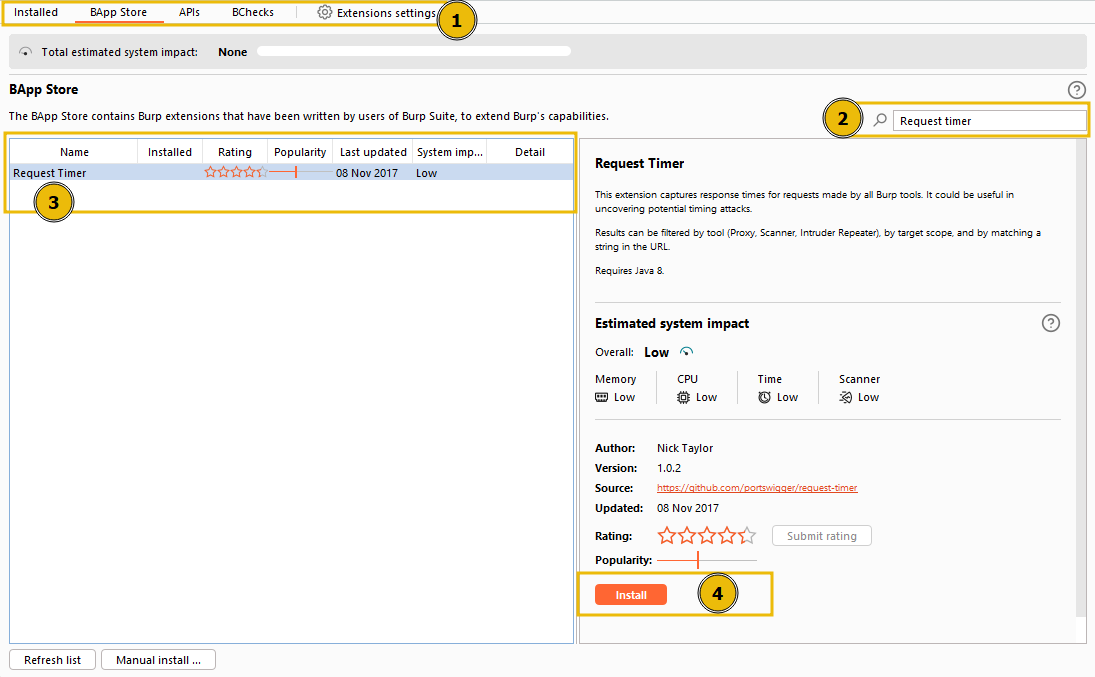
To get a feel for the BApp store and install a Java extension, let’s install the Request Timer extension, written by Nick Taylor. The Request Timer extension enables us to log the time it takes for each request to receive a response. This functionality is particularly useful for identifying and exploiting time-based vulnerabilities. For instance, if a login form takes an extra second to process requests with valid usernames compared to invalid ones, we can use the time differences to determine which usernames are valid.
Follow these steps to install the Request Timer extension from the BApp store:
- Switch to the
BApp Storesub-tab in Burp Suite. - Use the search function to find
Request Timer. There should only be one result for this extension. - Click on the returned extension to view more details.
- Click the
Installbutton to install the Request Timer extension.
After successfully installing the extension, you will notice a new tab appearing in the main menu at the top of the Burp Suite interface. Different extensions may have varying behaviours. Some may add new items to right-click context menus, while others create entirely new tabs in the main menu bar.
As this installation is simply an example of using the BApp store, we won’t cover how to use the Request Timer here. However, I highly recommend switching to the new tab and exploring the extension to understand its functionalities better. The Request Timer can be valuable in various scenarios, especially when assessing web application security and identifying potential time-based vulnerabilities.
Task 4 Jython
Note: If you are using the AttackBox, Jython integration has already been done for you, so you can skip this task.
To use Python modules in Burp Suite, we need to include the Jython Interpreter JAR file, which is a Java implementation of Python. The Jython Interpreter enables us to run Python-based extensions within Burp Suite.
Follow these steps to integrate Jython into Burp Suite on your local machine:
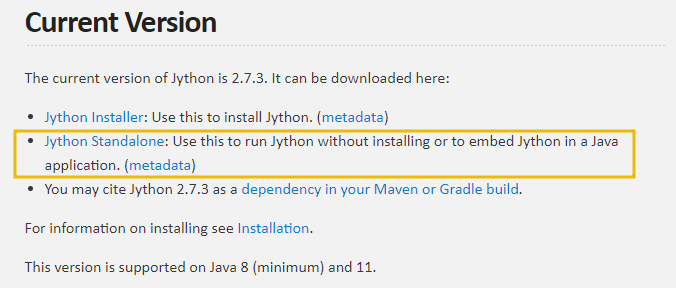
Download Jython JAR: Visit the Jython website and download the standalone JAR archive. Look for theJython Standaloneoption. Save the JAR file to a location on your disk.
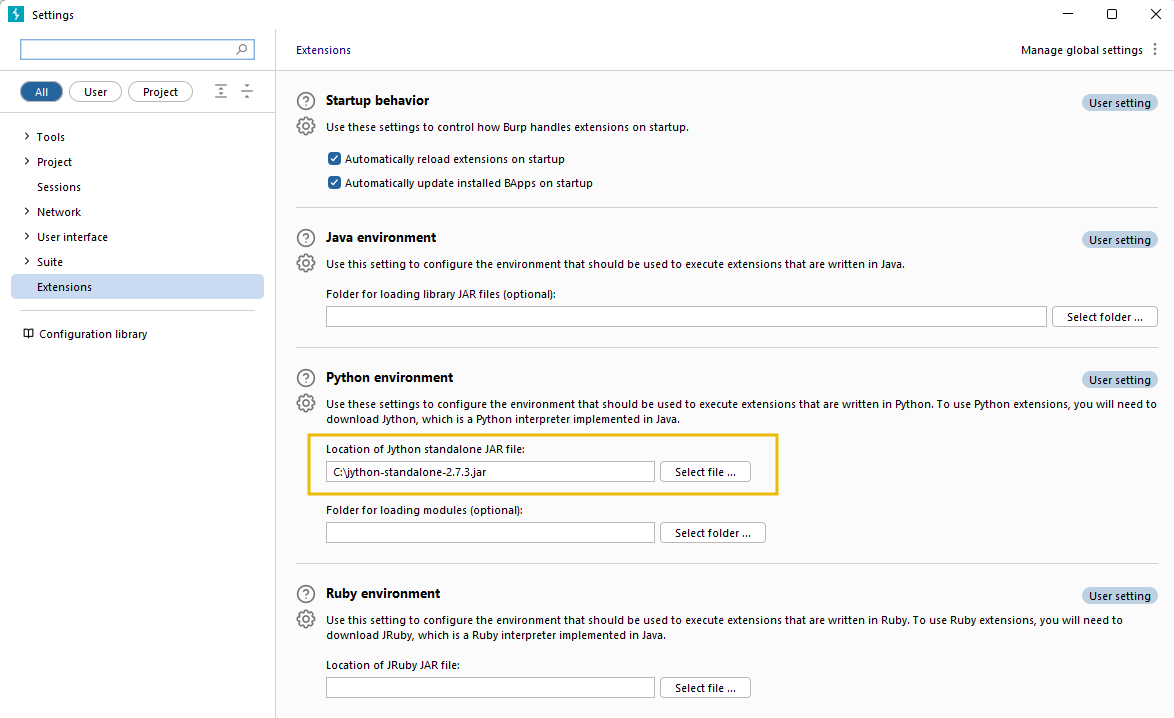
Configure Jython in Burp Suite: Open Burp Suite and switch to theExtensions module. Then, go to the Extensions settings sub-tab.Python Environment: Scroll down to the “Python environment” section.Set Jython JAR Location: In the “Location of Jython standalone JAR file” field, set the path to the downloaded Jython JAR file.
Once you have completed these steps, Jython will be integrated with Burp Suite, allowing you to use Python modules in the tool. This integration significantly increases the number of available extensions and enhances your capabilities in performing various security testing and web application assessment tasks.
Note: The process of adding Jython to Burp Suite is the same for all operating systems, as Java is a multi-platform technology.
Task 5 The Burp Suite API
In the Burp Suite Extensions module, you have access to a wide range of API endpoints that allow you to create and integrate your modules with Burp Suite. These APIs expose various functionalities, enabling you to extend the capabilities of Burp Suite to suit your specific needs.
To view the available API endpoints, navigate to the APIs sub-tab within the Extensions module. Each item listed in the left-hand panel represents a different API endpoint that can be accessed from within extensions.
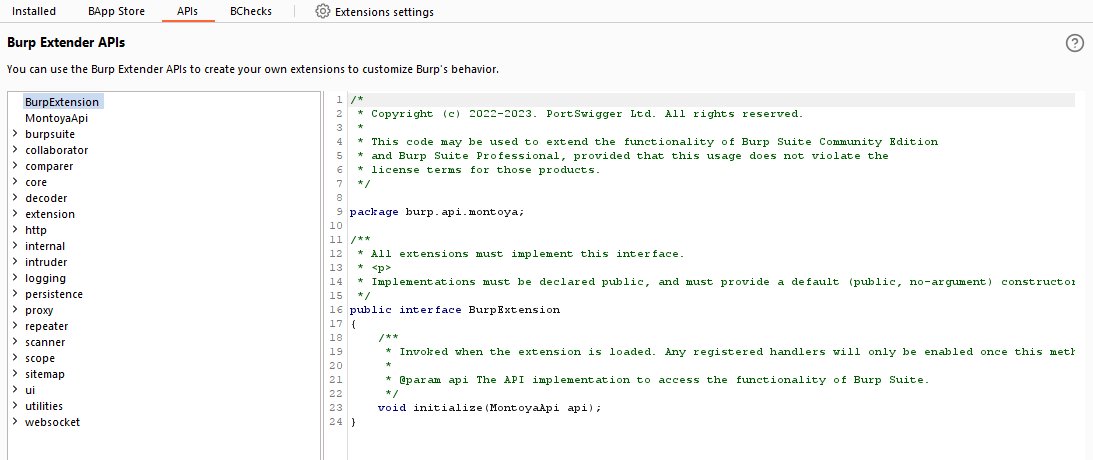
The Extensions APIs give developers significant power and flexibility when writing custom extensions. You can use these APIs to seamlessly interact with Burp Suite’s existing functionality and tailor your extensions to perform specific tasks.
Burp Suite supports multiple languages for writing extensions, such as:
Java (Natively): You can directly use Java to write extensions for Burp Suite, taking advantage of the powerful APIs available.Python (via Jython): If you prefer Python as your programming language, you can utilize Jython, which is a Java implementation of Python to create Burp Suite extensions.Ruby (via JRuby): Developers familiar with Ruby can leverage JRuby, a Java implementation of Ruby, to build Burp Suite extensions.
It’s important to note that coding your extensions for Burp Suite can be a complex task, and it goes beyond the scope of this module. However, suppose you are interested in exploring this area further and creating custom extensions. In that case, PortSwigger provides a comprehensive reference that is an excellent resource for developing Burp Suite extensions.
To learn more about Burp Suite extension development and to access the detailed reference, you can visit PortSwigger’s official documentation. This resource will provide the information and guidance needed to create powerful and customized extensions that enhance your experience with Burp Suite.
Task 6 Conclusion
Congratulations! You have completed the Burp Suite Extensions Room. By going through this module, you have gained valuable insights into how to use Extensions to enhance the functionality of Burp Suite.
You now have a solid understanding of how to:
- Install and manage extensions from the BApp store to extend Burp Suite’s capabilities.
- Integrate Jython to leverage Python modules within Burp Suite.
- Explore the APIs allowing you to develop custom Java, Python, or Ruby modules. With these skills, you can utilize the Burp Suite Extensions module to its fullest potential in your web application security testing and vulnerability assessments.
Great job completing the module, and kudos to you for your dedication and effort! Keep exploring, learning, and refining your cyber security skills. Happy hacking!